 English
 简体中文
简体中文
 Deutsch
 Español

Applications
How To Leak Test Flexible & Pliable Products
Leak testing flexible and pliable parts presents a number of challenges. This article provides guidance on how to achieve repeatable results.
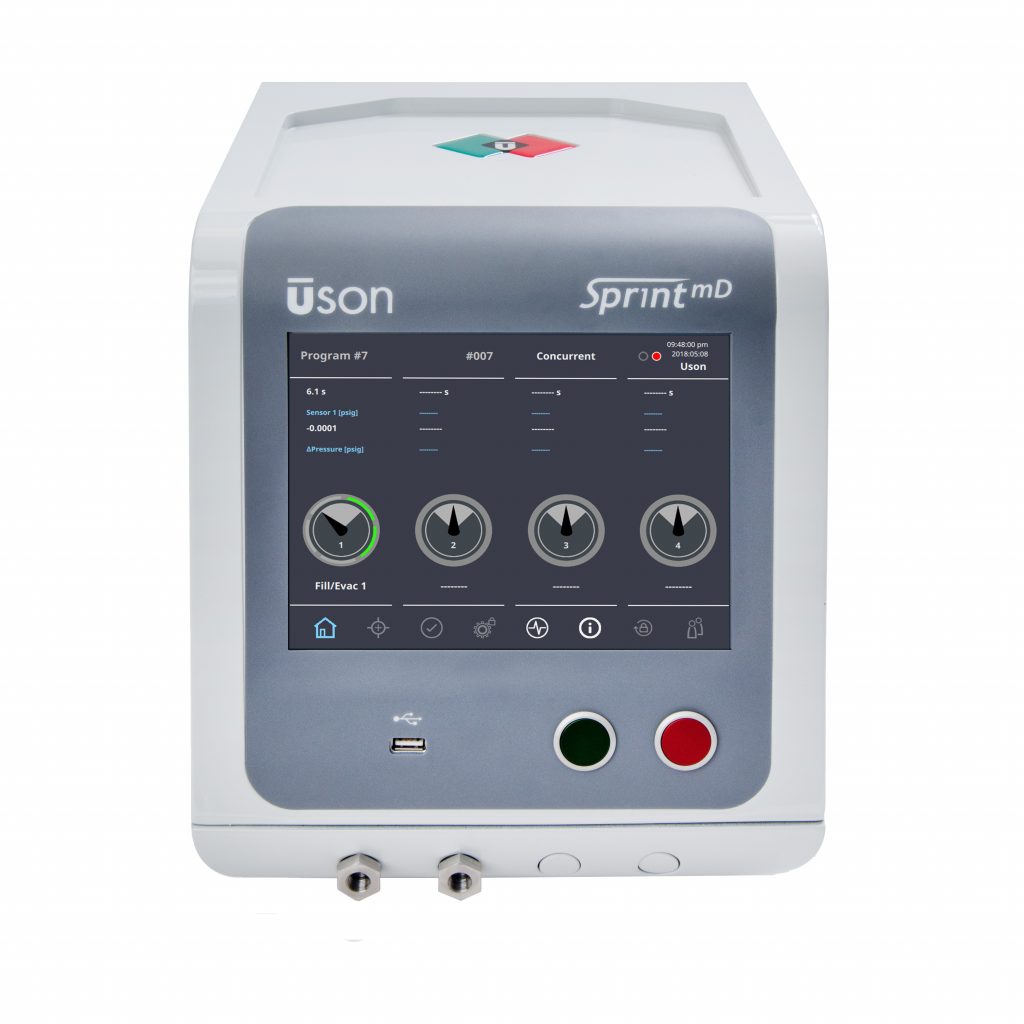
Like its predecessors, the SprintmD tester is capable of successfully tackling complex leak testing challenges. In this article I am going to take a deep dive into performing a check valve test with the Sprint mD leak tester, specifically how to approach testing the cracking or opening pressure of valves. The pressure at which the valve opens is a crucial performance factor and the SprintmD manages this application with ease. A simple check valve test can trip up most most leak testers. Here’s why:
The majority of pressure decay leak testers have one pressure sensor located upstream of the product being tested. This sensor is constantly supplied with air making detecting a downstream pressure change extremely difficult.
The SprintmD can be configured with highly precise flow control and two pressure sensors inside its already compact enclosure. The second pressure sensor or mass flow meter is positioned downstream of the valve and detects precisely when the valve opens and starts to disperse air. The change in pressure on the downstream side will tell the product engineer exactly how the valve will behave in its real, intended application.
The downstream sensor option can be applied to many SprintmD leak testers.
The SprintmD check valve tester works like this (Figure 1):

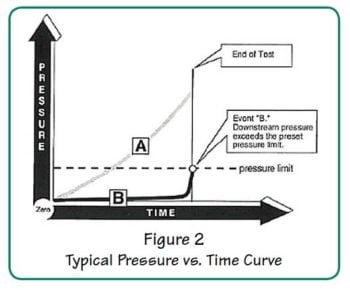
If the downstream sensor does not detect an event (pressure exceeding the pressure limit within the established test time), the program times out and SprintmD returns a FAIL result.
The check valve tester is valuable when testing duck-bill valves, check valves, pinch valves or devices that open slowly under applied pressure.
A downstream sensor is especially valuable for testing products that merely weep open or flow just a small amount when fully open.
The downstream configuration can also be used to leak test products that have two chambers not intended to have a passage between the two sides.
SprintmD can be used to perform normal pressure decay tests on either test port by incorporating a bypass valve that is used fast-fill valve in pressure decay testing.

For more information or to schedule a demo of the SprintmD or any of our leak testers contact us directly to speak to our experts, or reach out to your local Uson representative.
Leak testing flexible and pliable parts presents a number of challenges. This article provides guidance on how to achieve repeatable results.
Leak testing for packaging presents complex challenges. Destructive testing is messy and unreliable. Uson Qualipak overcomes many of the challenges.
These are three reasons why you should stop dunk testing and consider pressure decay or mass flow leak testing for improved results.